Sunday, September 30, 2012

Sparkling Microwave & Unclogged Tub

Things have been pretty busy lately so I've been letting some of my cleaning slide which has been driving me crazy. Yesterday morning when I was catching up on some cleaning, I figured it was a good opportunity to test out some of recent pins I have seen on Pinterest that uses white vinegar.

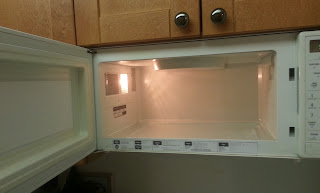
The first pin I wanted to try uses white vinegar to clean the microwave. I forgot to take a picture of the microwave before it was cleaned but trust me - it was pretty freakin gross. I followed the directions on Practically Functional's website and was amazed how easy the whole thing was.

I put about a cup and a half of water and a tablespoon and a half of white vinegar and a toothpick into a microwaveable bowl and put the solution in the microwave for five minutes. After the the five minutes were up, I kept the microwave door shut for an additional minute, just to make sure the steam soaked up all of the dirt and grime.

Next I took the bowl and tray out of the microwave with mits (they will be hot!) and started wiping down everything. All of the the dirt and grime came off immediately! I hardly had to put any elbow grease into it. And even more amazing, it took me about twenty seconds to clean the tray in the sink despite all of the grossness that was caked on there.

clean microwave with vinegar


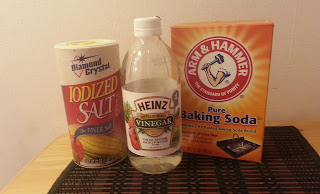
While I was cleaning the microwave, the solution I found on this pin was doing it's job on my shower drain and followed these simple directions from tidymom.net:

  • Mix 1/2 cup of baking soda and 1/4 cup of table salt. Pour down drain.
  • Pour 1 cup of heated vinegar down the drain (I heated it for 30 seconds in the microwave). It will foam and bubble.
  • Leave it for 15 minutes (I cleaned the microwave while it was sitting).
  • Run hot water for 30 - 60 seconds.
unclog tub

And that's it! In less than 20 minutes, I had a sparkling clean microwave and an unclogged tub. Couldn't believe how easy it was!

Pinterest tested. CM approved :)

xo ~CM
Monday, September 24, 2012

Storing Nail Polish

Lately I've had the problem of having too much nail polish. I know, I know, it doesn't sound like much of a problem but it's hard to store it all. I've been getting more and more free nail polish lately so they aren't fitting in my cases (below) any longer and I feel like I have nail polish in random spots all over my room. 
nail polishstore nail polish


I tried looking online for a solution but I didn't see that many solutions that I liked. I have been looking for a container like this for a while since I have makeup stored in similar looking cases but I haven't had much luck. I decided to pull out two wicker baskets and try them. It seems to work for now. I do like that they hold my nail polish removers and fits perfectly on my bookshelf.
store nail polish

store nail polish


If anyone has any other ideas, send them my way!

xo ~CM

Sunday, September 23, 2012

Zit Remover

I have no idea where I heard this tip from because I've been using it my own life. It's so simple that I think that when people hear it, they don't try it because they're doubtful it'll work. But I encourage everyone to give it a try because it works for me every time.

ZIts. Blemishes. Pimples. Either way you say it, they're not fun. I'm lucky enough not to get a lot of them but when I do, I put toothpaste on them. Right before going to sleep, I'll put a dab of toothpaste on my finger and then I'll cover the blemish with the toothpaste. When I wake up - it's gone! So simple and easy. The only times that this has not worked for me was when I didn't put the toothpaste on the first night of getting the zit.

I decided to do a little investigating and found that toothpaste has a lot of great other uses as well. Click here to check them out. Can't wait to try some of them!

get rid of zits


xo ~CM


Monday, September 17, 2012

Dry Nail Polish Quick

I'm lucky enough to get free nail polish from work which is awesome because I love trying out different colors. And since I found an easy and quick way to remove nail polish, now the only downside to experimenting with nail color is that nail polish takes forever to dry. I am always scared that I'm going to smudge my nails right away and I feel like I can't touch or do anything while they're drying. So when I found this pin on Pinterest, I was excited. But when I tried out the pin, I found that it wasn't as perfect as it seemed to be.


dry nail polish
According to the pin, if you submerge your nails into cold ice water for 3 minutes, your nails will be completely dry when you remove them. I was really optimistic after having so much success with the nail polish removal pin but when I put my hands into the water, I was starting to have my doubts. And the water was really cold which I probably should have been prepared for considering it's ice water. 


dry nail polish


I kept my hands in the water for approximately 4 minutes and when I removed them, my nails seemed pretty dry. When I touched them, they felt pretty dry too but they weren't dry enough to be completely smudge proof.
By the next morning, they did have a couple of minor smudges but nothing major. 

Overall, the process was okay. I would try drying my nails like this again but I'm just not going to expect perfect results. As for the nail color? Not a huge fan so I think I'll go with something else next time.

xo ~CM

Sunday, September 16, 2012

Designer band-aids

They really make designer everything nowadays. With Cynthia Rowley's band-aids, everything can be beautiful, even cuts & bruises. These are so cute that I think I'll have to go back to Duane Reade and pick them up.


cynthia rowley

xo ~CM

Nail Polish Removal

We've all seen a million ideas on Pinterest. But how many of them actually work? Could I really clean a microwave and tub with vinegar? Are creating designs on my nails really that easy? Would my cupcakes come out that amazing looking? I want to try some of these to see which ones work.

One that I have been wanting to try is this pin which says that the removing nail polish process can be real easy and cheap. I'm always one of those people who puts off taking off nail polish because it's just annoying to sit there scrubbing each nail individually. Sometimes it takes forever to get every last bit of the nail polish off. So any way to make it easier is fine by me. I found this process so easy! Here's how it worked for me:


remove nail polishremove nail polish
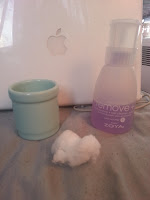
This is all you need. Nail polish remover, 2 cotton balls and a cup to put the remover in.
My nails beforehand. Yikes!


 remove nail polish
To get started, pour some nail polish remover into the cup. Unroll one of the cotton balls and split the strip into two pieces vertically. Then tear the cotton strips into 10 or 12 little pieces

Once you are ready to get started, dip the tip of each cotton ball into the cup. The cotton ball will start absorbing the remover once tip hits the liquid. Don't put the whole cotton ball in; it'll get wet on its own.


remove nail polish
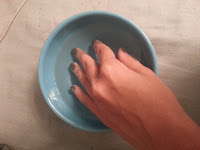
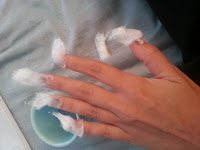
Put each wet cotton ball piece onto your nails. Push down when you apply each one. Relax for a minute or two while the cotton balls do their work.


Take the second cotton ball and start removing the nail polish. Start on the bed or bottom of your nail and then just push/move the cotton ball up using a little of force. The nail polish came off so easily! I couldn't believe it. It all came off in seconds.


remove nail polish
Next do the same process on your second hand.
The nail polish on this hand came off even better! Pretty much all of it came off.

I would definitely recommend this pin. The process was incredibly easy. It was just about a minute of doing actual work, and a couple of minutes of waiting while the cotton balls were on my nails. Enjoy!

Pinterest tested. CM approved :)

xo ~CM


Sunday, September 9, 2012

A Tangled Birthday

When my niece turned three in July, my sister of course wanted to make her birthday very special. My niece loved loved LOVED her 2nd birthday party. She constantly talked about all of the people who came and how much fun she had. She loved it so much that she would sit smiling at the table where everyone sang happy birthday to her and would pretend in her head that it was her birthday. So when my sister asked her a couple of months before her birthday what she wanted to do for her party, she immediately got excited and started making her guest list. She is obsessed with the movie Tangled so it was no surprise when she said that she wanted to have a Tangled birthday party.

When it came closer to the big day, my sister was having a hard time finding a Tangled cake so she decided to make her own. She looked up some ideas on Pinterest and google and saw that some people created their own tower out of things like donuts. One of my nieces favorite things to bake with my sister are rice crispy treats so she decided that to make the tower out of those. Genius! Rice crispy treats are easy to make and you can easily mold them. My sister used cupcakes for the "grass" and more rice crispy treats for the "road" under the cupcakes. And of course it's not a Tangled scene without the Snuggly Duckling - one of my nieces favorite parts of the movie.

I was so impressed. The cake came out fantastic and my niece absolutely loved it. At the party she went around to everyone asking "did you see my beautiful cake?" She was so proud of her cake and her mommy.

The birthday girls' favorite part of the party? Her birthday cake :)

xo ~CM


tangled rapunzel birthday cake
Birthday Cake

tangled rapunzel birthday cake
Birthday Party Cake

tangled rapunzel birthday cake
Birthday Party Cake - Road under the cupcakes


Monday, September 3, 2012

The Art of Soup

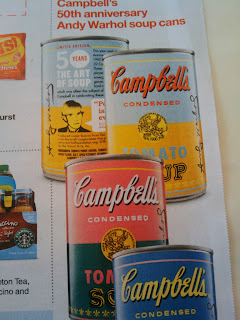
Andy Warhol is an inspiration to so many people. He was always pushing the limits and could make art out of pretty much anything. He taught us not to care what people think and to think outside the box. I love how Campbell's is celebrating the 50th Anniversary of "32 Campbell's Soup"with selling limited edition cans at Target.

xo - CM


andy warhol campbell's soup
andy warhol